
Creating an Effective Home Inspection Checklist: Inspection Checklist Tips for Property Owners
- AUT

- Apr 14
- 4 min read
When it comes to buying, selling, or maintaining a property, having a clear and thorough inspection checklist is essential. It helps you spot potential issues early, avoid costly repairs, and make informed decisions. Over the years, I’ve learned that a well-crafted checklist is more than just a list of items to tick off. It’s a practical guide that keeps you organized and confident throughout the inspection process.
In this post, I’ll share some inspection checklist tips that will help you create an effective and easy-to-use home inspection checklist. Whether you’re a property owner, a buyer, or navigating insurance claims, these tips will make your inspection smoother and more productive.
Why You Need a Solid Inspection Checklist
Before diving into the details, let’s talk about why a checklist matters. Imagine walking through a house without a plan. You might miss important signs of damage or overlook critical systems. A checklist acts as your roadmap, ensuring you cover every corner and every system.
A good checklist helps you:
Stay organized and focused during the inspection
Avoid forgetting important areas or components
Communicate clearly with inspectors or contractors
Document findings for future reference or insurance claims
For example, when I inspected my first property, I realized I had missed checking the attic ventilation. That oversight cost me a few hundred dollars in repairs later. Since then, I always include attic and roof checks in my list.
Inspection Checklist Tips: How to Build Your Own
Creating your own inspection checklist might seem daunting, but it’s easier than you think. Here are some practical tips to get you started:
1. Break It Down by Area and System
Divide your checklist into sections based on the property’s layout and systems. For example:
Exterior (roof, gutters, siding, foundation)
Interior (walls, ceilings, floors, windows, doors)
Plumbing (pipes, faucets, water heater)
Electrical (outlets, switches, panel)
HVAC (heating, ventilation, air conditioning)
Safety features (smoke detectors, carbon monoxide alarms, fire extinguishers)
This structure helps you stay organized and ensures you don’t miss anything important.
2. Use Clear, Simple Language
Avoid technical jargon. Use straightforward terms that anyone can understand. For example, instead of “inspect for efflorescence,” say “check for white powdery deposits on basement walls.”
3. Include Space for Notes and Photos
Sometimes, a simple yes/no answer isn’t enough. Leave room to jot down observations or take photos. This documentation can be invaluable when discussing repairs or filing insurance claims.
4. Prioritize Safety and Structural Integrity
Focus on items that affect the safety and stability of the property first. Issues like foundation cracks, electrical hazards, or water leaks should be flagged immediately.
5. Customize for Your Property Type and Location
Different properties have different needs. A checklist for a condo will differ from a detached house. Also, consider local climate and common issues in your area. For example, in colder regions, checking insulation and heating systems is crucial.

Creating a home inspection checklist helps keep the inspection organized and thorough.
What are the 7 Steps of the Inspection Process?
Understanding the inspection process itself can help you create a more effective checklist. Here are the seven key steps I follow:
Step 1: Preparation
Gather all necessary tools like a flashlight, camera, and your checklist. Review any previous inspection reports or property history.
Step 2: Exterior Inspection
Start outside. Check the roof for missing shingles, gutters for blockages, and the foundation for cracks or water pooling.
Step 3: Interior Inspection
Move inside and examine walls, ceilings, floors, windows, and doors. Look for signs of water damage, mold, or structural issues.
Step 4: Plumbing Check
Test faucets, toilets, and showers. Look under sinks for leaks and check the water heater’s condition.
Step 5: Electrical System
Test outlets and switches. Inspect the electrical panel for any signs of wear or improper wiring.
Step 6: HVAC System
Turn on heating and cooling systems. Check filters, vents, and listen for unusual noises.
Step 7: Safety Features
Ensure smoke detectors and carbon monoxide alarms are working. Check fire extinguishers and emergency exits.
Following these steps ensures a comprehensive inspection and helps you fill out your checklist accurately.
Common Pitfalls to Avoid When Using Your Checklist
Even with a great checklist, mistakes can happen. Here are some common pitfalls and how to avoid them:
Rushing through the inspection: Take your time. A thorough inspection can take a few hours.
Ignoring small issues: Minor problems can become major if left unchecked.
Not updating the checklist: Properties change over time. Update your checklist regularly to reflect new concerns or improvements.
Skipping documentation: Always take notes and photos. They provide proof and help with future repairs or claims.
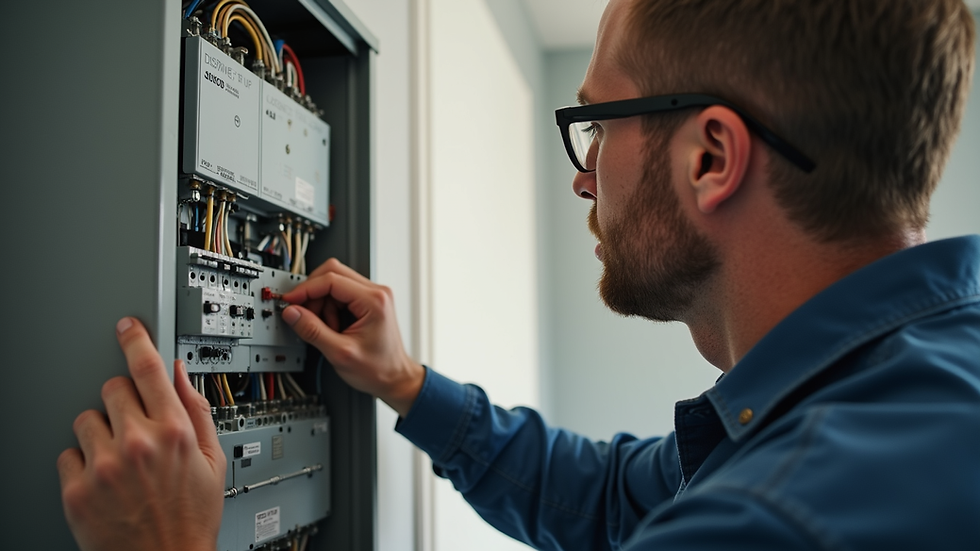
Inspecting the electrical panel is a critical part of the home inspection process.
How to Use Your Home Inspection Checklist Effectively
Having a checklist is one thing, but using it well is another. Here’s how I make the most of mine:
Bring a printed copy: Digital is great, but paper is handy for quick notes and sketches.
Work with a professional: If you’re not confident, hire a certified home inspector. Use your checklist to follow along and ask questions.
Review findings immediately: After the inspection, go over your notes and photos. Highlight urgent repairs.
Share with relevant parties: If you’re buying or selling, share the checklist with your realtor, contractor, or insurer.
Keep it for future reference: Store your checklist safely. It’s a valuable record for maintenance and claims.
If you want a ready-made template, you can find a detailed home inspection checklist that covers all the essentials.
Taking Control of Your Property’s Condition
Creating and using an effective inspection checklist puts you in control. It helps you spot problems early, plan repairs wisely, and communicate clearly with professionals. Whether you’re managing your own home or handling insurance claims, this simple tool can save you time, money, and stress.
Remember, the goal is not just to find faults but to understand your property better. With a solid checklist and a careful eye, you’ll feel confident making decisions that protect your investment and your peace of mind.
By following these inspection checklist tips, you’re well on your way to mastering the home inspection process. Take it step by step, stay organized, and don’t hesitate to ask for help when needed. Your property deserves the best care, and so do you.


Comments